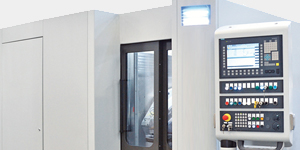
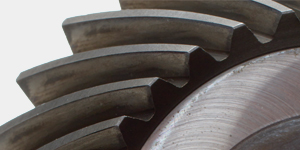
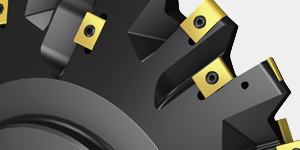
Manufacturing of straight bevel gears was in the past only possible on specially dedicated mechanical machines. Such machines are by nature difficult to set up, with limited ability to precisely repeat the setup. Mechanical machine setup has been historically slow and time consuming. New developments allow the use of the straight bevel gear cutting system known as Coniflex® on the Phoenix free–form machine. This patent–pending methodology takes advantage of the Phoenix free–form flexibility and reduces setup time to a minimum while applying the Coniflex cutting system used previously on mechanical machines.
Coniflex straight bevel gears are cut with a circular cutter with a circumferential blade arrangement. The Coniflex cutters are arranged in the machine under an angle of e.g. 24° to a plane which is perpendicular to the generating plane or cradle plane. The upper cutter disc is inclined to point down with the cutting zone of the blades and the lower cutter is inclined to point up (Figure 1 ). The blades of the lower cutter move through the gaps between the blades of the upper cutter while rotating (and vice versa). This pair of cutter disks and the arrangement in the cutting machine is called the interlocking cutter system.

The upper cutter cuts the upper flank only and is therefore equipped with blades that have their cutting edges toward the top of the figure. The lower cutter in turn cuts the lower flank and is equipped with blades that have their cutting edges toward the bottom of the figure. The two cutters generate a combination of profile and length crowning in the flank surfaces. A side effect of the cutter arrangement is a curved root line, depending on the cutter diameter.
The two cutters represent one tooth of a generating gear which subsequently requires the setup possibilities for a variety of job designs. The cutters can be moved away from the center of the cradle to achieve a certain mean cone distance. Since the Coniflex flank line tangents point to the pitch apex, it is necessary to adjust the angle of the flank line tangent with the so–called space angle. To control the slot width using existing cutters the cutters can independently be shifted apart or toward each other. Some Coniflex machines allow an additional freedom to adjust both cutters in order to modify the length crowning (swing angle). Coniflex is a completing process which, compared to spiral bevel gear wet cutting, is considered a rather fast process. Figure 2 shows a Gleason No. 2A Coniflex generator with the interlocking cutters engaged in a slot of a ring gear.

In the case of a 20° pressure angle system and a tilt angle of 20° for each cutter the planes of the cutter disks would generate flank surfaces which consist of precise spherical involutes. However, also in straight bevel gears a located flank contact is desired which lead to a modified cutter and cutter tilt design. If in the case of a 20° pressure angle system the tilt angle of the cutter disks is 24° and the cutting edge, rather then being part of the cutter disk plane, form an internal cone of 86° cone angle (90° – 4°), then the internal cone generates a certain length crowning. This effect in connection with curved cutter blades is used to produce the crowning in straight bevel gears. As mentioned before, it is always a pair of cutters, one left hand and one right hand cutter, required to realize the interlocking arrangement in the cutting machine in order to cut both flanks of a slot at the same time.
There is still a considerable demand for straight bevel gears and machines for their manufacturing. However, there was never a full CNC machine developed to satisfy the present demand. Manufacturers of straight bevel gears were relying on remanufactured mechanical machines, some of which are equipped with partial CNC functions like cradle roll, sliding base, ratio of roll, and indexing. The reason why no Coniflex CNC free–form machine was designed becomes evident after studying the geometrical concept in Figure 2 . It is not possible to utilize a six–axis machine because of the double tilted cutter spindles and the interlocking cutter arrangement. To configure a regular six–axis free form machine with the Coniflex double spindle head including an automated head setup would have introduced six additional axes with complicated setup actuators. The cost to build such a machine is between 150 and 200 percent of today’s Phoenix® II free–form generator.
Motivation of Coniflex Cutting on Free Form Machines
Manufacturers of straight bevel gears are processing mostly low quantities and a high variety of different designs. The applications are differential gears for special equipment, electrodes for forging dies and powder metal dies, and machine tool applications, etc. The demand for higher quality straight bevel gears has been raised, together with the desire to apply a defined hard finishing method such as grinding.
Manufacturers with a high job variety and many changeovers between jobs would invest in a modern machine tool for their straight bevel gear needs if it was also possible to put the machine to different uses; e.g. to cut spiral bevel gears. A six axis free–form machine can present a tool in every desired position and angular inclination to a work. This is the basis for the ideas that realized Coniflex cutting on Phoenix free–form machines. It is only possible to use one cutter which makes the completing process “semi completing.” The cycle time is still acceptable since the free form machine with direct spindle motors indexes extremely fast, and since the higher stiffness of a Phoenix machine allows a cycle of rapid plunge and limited roll.
There are additional features like independent correction of upper and lower flank (even using different ratio of roll, root angle, tilt angle and more), summary storage and fast setups, and the possibility to implement cutter disks with carbide tips, that would allow a high speed dry cutting of Coniflex gear sets.
Conversion of Coniflex Summaries to Phoenix II Machines
Coniflex summaries which have been calculated for the Gleason machine Nos. 2A, 102, 104, and 114 can be converted to general basic settings in order to perform Coniflex cutting on Phoenix II free–form machines. The procedure that has been developed follows the list of steps below:
• Conversion of Coniflex summary into general basic settings
• Conversion of upper and lower Coniflex cutter separately
• Transformation of basic settings into free form motions
• Reverse mount Coniflex cutter on the free form machine to avoid too negative machine root angles
• Rolling of root only to the bottom of the involute (avoids undercut and reduces negative machine root angle) rolling face like on Coniflex machine
• Calculate work phase angle set over between upper and lower cutting in order to manufacture correct slot width
• Use vector feed to allow cutting slot from solid with outside blades only (no alternating blades)
Coniflex straight bevel gear cutting summaries that use interlocking cutters contain the following gear geometry relevant settings. The settings of group 1 are initially identical for the upper and lower cutter but may be changed in the course of contact optimizations on the mechanical machine. The settings of group 2 are always identical for the upper and lower cutter in the mechanical machine. In a free–form machine all settings of group 1 and 2 may be changed in order to optimize a pinion or gear:
Summary Settings Group 1
Space Angle
Cutter Offset
Cutter Cone Distance
Cutter Swing Angle
Summary Settings Group 2
Cradle Test Roll
Work Test Roll
Start Roll Position
End Roll Position
Machine Root Angle
Sliding Base
For the correct positioning of the cutter in the machine the tool related dimensions of group 3 are required:
Summary Settings Group 3
Actual Cutter Diameter
Cutter Reference Height
In order to convert a summary of a mechanical machine into basic settings the machine constants of group 4 are additionally required:
Summary Settings Group 4
Cutter Tilt Angle
Swing Axis Constant
Cutter Gage Reference Radius
With all the information of groups 1 through 4 available, the basic machine setup can be calculated according to the vector diagram in Figure 3 . The first step, after the cutter is positioned with the tip of the Rw vector in the origin of the coordinate system (cutter axis parallel to Y–axis) is a cutter tilt rotation around the Z–axis, followed by a movement of the cutter tip Rw to the cutter cone distance (vector Rm1). Then the cutter tip is moved in X–axis direction about the cutter offset ET and rotated around the Y–axis about Θs to achieve the space angle inclination. The lower diagram in Figure 3 shows the movement XB in direction of the Y–axis to the proper sliding base position. In some cases there is a swing angle setting (not shown in Figure 3 ) which requires an additional rotation of the cutter around the X–axis. Also the adjustment of the work root angle is not shown in the diagrams, it requires a rotation of the work around the X–axis. A similar conversion is done for the lower cutter setup. Although initially the lower cutter arrangement is a mirror image of the upper cutter setup (mirror in a horizontal plane that contains the cradle axis), the conversions are done separate and independent. If corrections have been made to the theoretical summary, the upper and lower cutter setup may differ from each other and the independent conversion will correctly transfer those corrections into the free form machine setup.

Reverse Coniflex Cutter Mounting
Figure 4 demonstrates that the slot width taper and additionally the work root angle leads in case of a regular mounted cutter to highly negative machine root angles in a free–form machine (center roll position is shown). By reversing the cutter disk such that the cutting edges point away from the cutter spindle the cutter finishes the right flank in the left slot in Figure 4 , which swings the cutter axis in the positive γ direction. The common limitation of γ = –3° on free–form machines would present a problem with regular cutter mounting. This problem is completely eliminated without any negative side effect if the cutter is used in the reverse mounting arrangement.

Cutting Cycle and Generating Roll Strategy
A basic cycle comparison is shown in Figure 5 . The upper diagram in Figure 5 represents the cycle of a No. 102 Coniflex machine. Roll angle changes are plotted along the abscissa, plunge advances of the cutter are plotted along the ordinate. The cycle starts with a first plunge, followed by a rough roll to the start roll position. The next step is a set in plunge to full depth, followed by a finish roll from start roll to the end roll position. Then the cutter is withdrawn to the index position, the cradle rolls back to center of roll, and the indexing to the next slot occurs.

The lower diagram shows the cycle of cutting the same bevel gear on a free–form machine. The red vectors represent the cutting of the first cut lower slots. It begins with a plunge to full depth (at the root roll position), followed by the finish roll to the top of the profile. Then the cutter withdraws, rolls to the start roll position, and indexes to the next slot. After all flanks in the lower position are finished a setover of the cutter in the upper position and a setover rotation of the work occurs. Now the cutter approaches the full depth with rapid plunge feed, since the slotting operation had already been conducted in the lower position and immediately the finish roll begins and rolls the second flank from root roll position to the top of the flank.
The lower diagram in Figure 5 leaves some questions unanswered, such as how a cutter with only “outside” blades can perform a slotting operation without damage, and why the roll angle required for one flank is only about 65 percent of the roll travel of a mechanical machine with interlocking cutters.
As the lower slot is cut first in the presented example, it is important to approach the work with the cutter in a manner to prevent the clearance side of the cutter from any cutting action. Figure 6 shows a schematic of the cutter in the start roll position. The feed vector is derived in the final plunge position at the start roll position attached to the clearance corner of the cutter at the center face width such that enough stock is left on the not yet generated flank 2. The feed vector is preferably perpendicular to the root at the mean face width. If the cutter follows with the clearance cutting edge side the vector shown in Figure 6, then only the cutting edges and the blade tips are subjected to any chip load, which prevents damage to the clearance side blade edges and leads to an efficient and smooth cutting action.
The plunge position in Figure 6 already forms the root of flank 1. The cutting edge generates a zero–degree pressure angle area, which generally is not part of the operating portion of the flank anymore. Zero degree is sufficient to form the trochoidal part of the root, below the flank, yet it will avoid undercut in cases where it would be generated while rolling in negative direction, away from the flank. Not rolling beyond a zero–degree pressure angle will therefore eliminate the risk of undercut and mutilation and reduce the cycle time on the free–form machine.


Figure 7 shows the roll diagram for both cutters drawn in the top roll position. To fully generate both flanks in case of two connected interlocking cutters like in the mechanical machine it is required to roll from position 1L to 3U which amounts to a roll range of 40°. In a free–form machine it is only necessary to roll either cutter through the required range for the particular flank, which is for the lower cutter from 2L to 1L, which is 20° of roll and for the upper cutter from 2U to 3U, also 20° of roll. The bottom diagram in Figure 7 shows the different possibilities of roll ranges:
Free–Form Machine
• Seamless rolling between –20° to 0° of lower position and 0° to +20° of upper position
• Gap between lower and upper roll range
• Overlap between lower and upper roll range
Mechanical Machine
• Only one roll range from –20° to +20° of interlocking cutters.

Cycle times on modern free form machines are always expected to be lower than the times on older mechanical machines. The interlocking cutter arrangement of the Coniflex machines involve two cutters simultaneously in the chip removing action. The free form machine uses only one cutter and has therefore only half the number of cutting edges in action (applying in both cases the same surface speed). This relationship would basically tell that the cutting time on a free–form machine is about twice that of a mechanical machine. However, the two cutters of a mechanical machine are not always both part of the active chip removal except during the plunge part of the cycle. During the roll of flank No. 1, the opposite lower cutter idles with respect to chip removal. In the case of rolling flank No. 2. the upper cutter does not remove any chips. The free–form machine on the other hand has only cycle parts, where the one cutter which is used removes chips on its cutting edges and during the plunge additionally on the tips. The table in Figure 8 shows a cycle time comparison of four different Coniflex gears (pinions):
• 13 tooth pinion No. 102 compared to Phoenix II 275HC
• 20 tooth pinion No. 104 compared to Phoenix II 275HC
• 16 tooth pinion No. 114 compared to Phoenix II 600HC
• 83 tooth gear No. 114 compared to Phoenix II 600HC
In this comparison the cycle times in the free–form machines are 11 to 25 percent greater than on the comparable mechanical machine. In the ongoing developments coated Coniflex cutters with full blade point and different side rakes are tried in order to increase the productivity of the new free form process.
Calculation of Work Phase Angle Setover
Figure 9 shows the upper cutter as positioned in the mechanical machine and represented by the basic settings in a front view as well as a top view. A first rotation around the X–axis of the indicated coordinate system about the machine root angle γm lines up the work axis with the Y–axis of the coordinate system. A second rotation around the Y–axis, until the cutter axis vector is horizontal and does not contain a component in X–axis is necessary to determine the angle ΔWZU. This is the position cutter and work have in the free form machine with respect to the relationship between work and cutter while the cutter axis is horizontal. In case of cutting the first (lower) flank, this is not significant. In case of cutting the second (upper) flank it is important in order to achieve the correct slot width to rotate the work back into the neutral position about ΔWZL and after that about ΔWZU in direction of the rotation vector indicated in the center of the work in Figure 9 to the correct upper position.

The set over rotation between the upper cutting of flank 1 and the lower cutting of flank 2 in order to cut the correct slot width in the correct position is therefore calculated as: ΔWZ = ΔWZU + ΔWZL
It has to be mentioned that one cutter in the free–form machine can represent both cutters of the mechanical machine. The lower portion of the cutter represents the upper cutter and the upper portion of the cutter represents the lower cutter. This is the reason why one single cutter is moved in the free–form machine (after conversion to basic settings and transformation of the basic settings in free form coordinates) in the upper position, using the summary of the mechanical machine for the upper cutter and in the lower position, using the summary of the lower cutter of the mechanical machine. Likewise, the correct work rotational position has to be established with a phase angle rotation of ΔWZ.
Hard Finishing of Coniflex Gears
This method can be applied to grinding also because it converts a method of using interlocking cutters into a method of cutting with a single cutter. It does not seem practical to use segmented grinding wheels, which is why in the past a grinding method was never developed for Coniflex gears. Even with a single grinding wheel that duplicated the enveloping internal cone surface of the cutting edges, a major obstacle occurs with respect to the dressing removal and the compensation thereof. The cutting edges of a Coniflex cutter form an internal cone which makes dressing in radial direction impossible (even if a diameter change was acceptable within limits). Also dressing in an axial direction is not a possibility because the difference between maximal and minimal blade point would only allow a few redressings.
Since the geometry changes due to redressing eliminate the possibility of dressable grinding wheels, a permanent CBN coated grinding wheel seems the only realistic tool for the task of grinding Coniflex gears. A CBN galvanic ally coated steel wheel can be manufactured to duplicate the enveloping surface of the cutting edges in a free–form grinding machine, which allows a defined hard finishing of straight bevel gears preserving the identical flank form. This is a planned future development which will allow the use of Coniflex gears in many applications where grinding as a hard finishing process is required, like in many aircraft gears. Often when straight bevel gears are the gears of choice for a certain application, but grinding is required to fulfill the requirements in accuracy, Zerol gears are used instead because they are the closest to straight bevel gears. Ground straight bevel gears have been machined in the past on Maag two–wheel generators or on Heidenreich & Harbeck grinders, until those mechanical vintage machines were not available anymore. Today’s demand for ground straight bevel gears could be covered with the possibility of Coniflex grinding. Coniflex gear sets present many advantages in their geometry which contains length crowning and controllable contact size and location. With the future possibility of grinding Coniflex gears, a complete new field of applications will open up for this revitalized and well–established process.
Abstract
Manufacturing straight bevel gears in the past was only possible on specially dedicated machines. One type of straight bevel gears are the gears cut with a circular cutter with a circumferential blade arrangement. Figure 10 shows a pair of 4.5 inch Coniflex cutters as they are used on the Gleason machine Nos. 2A, 2E, and 102. The machines and cutters used to manufacture these gears are known by the Gleason trademark, Coniflex®. The cutters are arranged in the machine under an angle in an interlocking arrangement which allows a completing cutting process. The two interlocking cutters have to be adjusted independently during setup, which is complicated and time consuming.

The outdated mechanical machines have never been replaced by full CNC machines, but there is still a considerable demand in a high variety of low quantities of straight bevel gears. Just recently it was discovered that it is possible to connect one of the interlocking straight bevel gear cutter disks to a free–form bevel gear generator and cut straight bevel gears of identical geometry compared to the dedicated mechanical straight bevel gear generator. A conversion based on a vector approach delivers basic settings as they are used in modern free–form machines. The cutter is mounted to a shaft, which is connected to the cutter spindle. Additional features like reverse cutter mounting, vector feed, and root limited roll finally enabled the straight bevel cutting process on modern free–form machines.
The advantages are quick setup, high accuracy, easy corrections, and high repeatability. Because of the use of a single cutter disk, it is possible to cut Coniflex bevel gears on standard free–form cutting machines. The grinding technology of straight bevel gears whose geometry is based on an interlocking cutter system is being developed in the next development step.
Literature
- N.N. Operating Instructions for No. 2A Straight Bevel Generator, The Gleason Works, Rochester, New York, 1961
- N.N. Calculating Instructions Generated Straight Bevel CONIFLEX® Gears (No. 2A, 102, 104, 114 and 134 Straight Bevel CONIFLEX Generators).
Printed with permission of the copyright holder, the American Gear Manufacturers Association, 500 Montgomery Street, Suite 350, Alexandria, Virginia 22314–1560. Statements presented in this paper are those of the author and may not represent the position or opinion of the American Gear Manufacturers Association.


