A quality-control plan for parallel-axis gear manufacturing requires significant investment in analytical and functional inspection equipment, labor, and production cost. Minimizing these costs requires a good plan. Moving the analytical inspection equipment closer to the manufacturing location has consequences that can increase costs. One of the common mistakes in an attempt to avoid extra costs is removing functional gages from the plan. Thus, a decrease of the efficiency is at risk as more analytical equipment is required. Usually audit inspections are made on analytical gear checkers post-process to certify the quality or identify characteristics that don’t meet requirements. The payoff of this expense is difficult to establish and, by itself, doesn’t guarantee performance. Plus, such inspections come along with time lags that create additional cost — especially if the production process produces scrap while waiting for the inspection result.

The objective of this article is to 1) review the current practice at each operation, its impact on process control, and resultant productivity gains; 2) suggest adjustments to the conventional plans; and 3) identify emerging measurement and inspection technology.
Gear grinding is able to consistently produce near master-gear quality when the pre-grind process quality is monitored and controlled properly. The cost of gear grinding has declined over the last 25 years due mainly to a 10-fold productivity increase enabled by tools running on machines with ultra-high speed spindles and fast CNC processing to maintain perfect synchronization. However, gear grinding without adequate control of pre-grind quality may not produce acceptable results at all — considering that quality of the finished gear depends heavily on pre-grind quality. Grinding is expected to remove all heat-treat distortion of the gears’ size and shape. Preparing a gear for grinding also requires a process after heat treatment to qualify the bore and/or faces for proper locations and clamping in the grinding machine. Quality control of this “datum qualifying” step of the process is critical, but frequently the control plan underestimates the value of gaging at this operation.

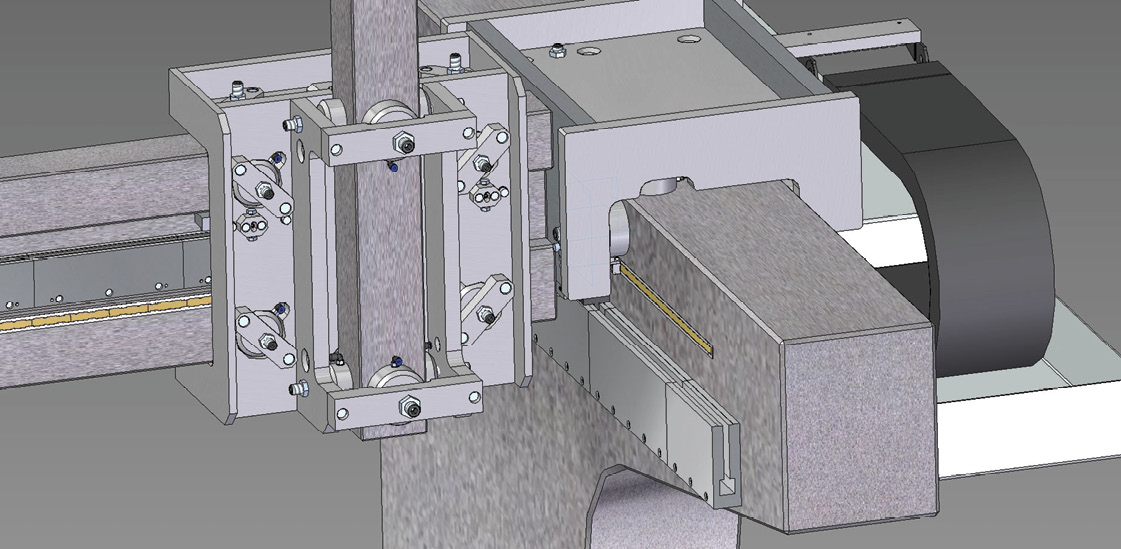
Functional gear inspection refers to measurement of gear quality either by meshing and rolling in full contact with a master gear or measuring direct size over a ball or pin as specified on the print. Size can be determined by computerized double-flank rolling gages that use an absolute position scale, making this the preferred method. This is depicted in Image 2.

Single-flank rolling gages appear to be similar but are much more complicated to build due to the requirement that a resistance must be applied to one gear member, and the measurements of angular position of both gear members must be taken. Thus, a computer with specialized software is needed, making this method quite expensive. The single flank rolling gage measures transmission error directly, but this value is not specified on the print or by industry gear class standards. So, while it is an excellent gage, it is not usually cost effective. A practical single flank test is one that simply records the sound vibration to identify if the control plan is effective.
Inspection and measurement technologies have not kept pace with the advance of productivity in hobbing and grinding. Time required to measure a gear is essentially the same as it was in 1990. Meanwhile, more detailed evaluation for bias control extends the measurement time further, thus adding more cost. This demands more investment in measuring equipment and/or a lower audit frequency. As manufacturers of inspection equipment this is not all bad; however, we know as cost of quality control becomes proportionally greater, it is more important to choose the proper plan and equipment. Modern inspection equipment is connected to the gear manufacturers’ servers to maintain a data record of quality. With the advent of Industry 4.0, the control plan can include equipment suppliers as partners in knowledge with direct access to critical data streams. It has been common for many years to “dial in” to collaborate on a particular troubleshooting task. File-sharing sites further streamline the ability to see necessary data that translate into huge efficiency benefits. Can you imagine a “great and powerful Oz” type of specialist in gear quality who might offer services to the industry? Think of an analogy from Major League Baseball where replays initiated by challenges from all games nationwide are reviewed and judged by one person from a single location. But efficiency gain can be elusive, so let’s go back to basics and reality.

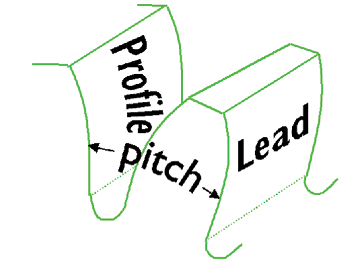
Modern gear-inspection and process-measurement methods, combined with appropriate quality control plans, provide significant payoff. Analytical gear inspection refers to the measurement of physical tooth micro geometry, size, and tooth position compared to nominal values relative to the gear components’ true datum. This is accomplished on specialized 4-axis CNC inspection equipment with a probe tracing the teeth to collect digital data for evaluation of standard characteristics for index, pitch helix, and profile. Gear quality class can be determined according to international standards published by DIN, ISO, JIS, or AGMA. While the various international standards are converging to a common definition, customer- and application-specific micro geometry tends to diverge from any common standard definition. Custom evaluation software amplifies this trend. Gage suppliers are typically pouring more resources into software than the hardware. The evaluation in many cases can make interpretation complicated. In seminars for advanced grinding methods, participants frequently identify interpretation of gear charts as their highest priority for education. A closely related common question is how to determine process correction action from the charts. The fact is most tooth traces that deviate from tolerance are affected by multiple process variables and are not evident. Calculations are simple to make for correction of profile or helix slope (fHa/fHb) and even tooth bias. But form deviations and runout influence the slope. Most analytical inspections are only for four teeth, which could mask or be misleading in the effort to pinpoint the process or set up variables affecting the outcome. Something is lacking in this approach. This type of “inspection chart” is essentially the same as on early-computerized gages of the 1980s. Interpretation of this result is still a common weakness of quality and production personnel.
Both analytical and functional inspections are essential for quality control and — if deployed properly in the process — can be cost effective. Specific gages can be used before, during, and after the process. That is pre-process, in-process, and post-process.

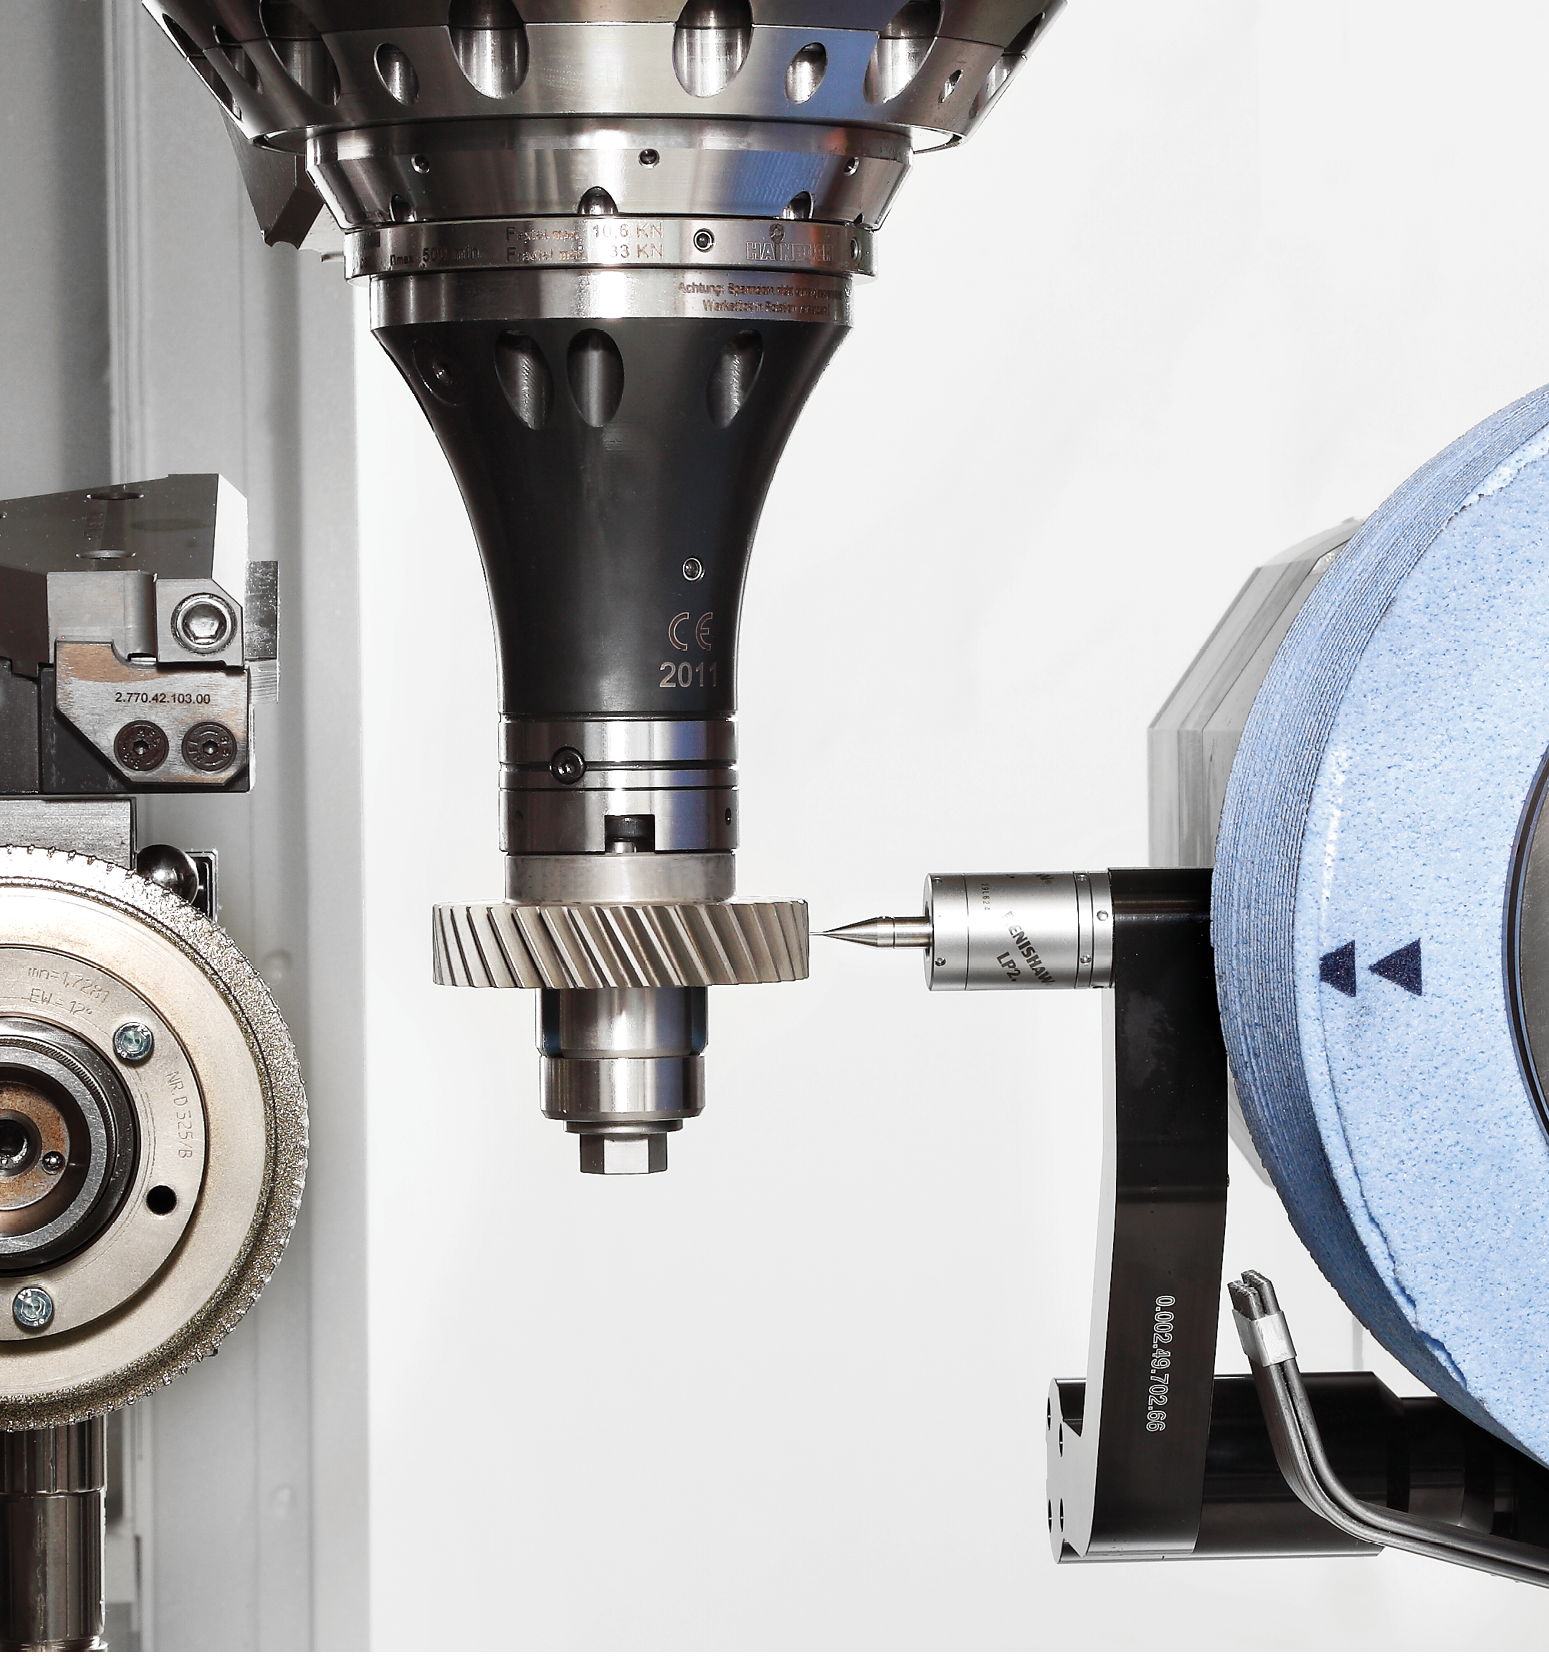
Most grinding machines today offer an on-board probe for specific dimensional control and, as set up, aid to inspect and calculate corrections required before starting production. Involute profile angle or slope (fHa) can be adjusted to well within the tolerance limit in this manner. An initial correlation is established with the analytical gage to increase confidence in the measurement. The probe also can qualify the clamping device mounting and function automatically prior to grinding. An on-board probe was offered for the first time in 1994 on grinding machines from Kapp Niles. The payoff was enormous, and the feature has been selected on the vast majority of Kapp Niles gear grinding machines for more than 20 years. Independent analytical inspection still is required, of course, and essential for process quality. Specific characteristics such as tip relief, root relief, and form deviations can be measured accurately on the analytical gage due to density of measured points and more sophisticated software. For carburized and quenched large gears more than 500 mm in diameter and with face widths of more than 200 mm, an on-board probe is used for pre-process alignment to optimize stock removal and determine infeed required for “clean-up” of each tooth flank. This practically eliminates the risk of excessive stock removal in any grinding pass, dramatically reducing grinding time.
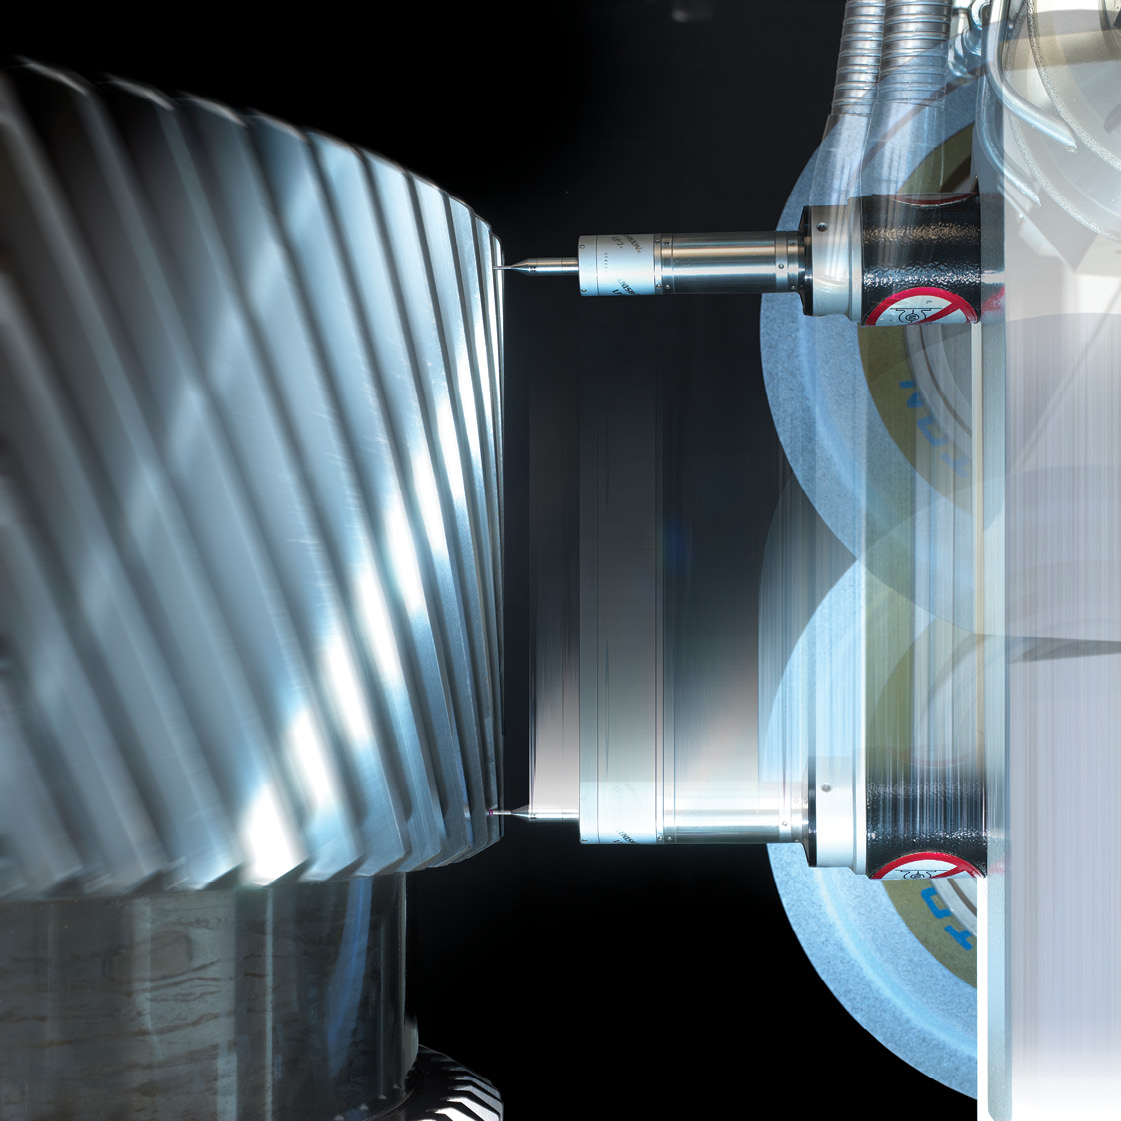
Another application of the on-board probe is for in-process measurement of size prior to the final grinding pass. The image depicts the rapid measurement along the length of the flank.
Note that an on-board probe is used in post-process, in-process, and pre-process measuring. When a process is in control, the analytical gage can be devoted for critical tasks such as heat-treat distortion studies, certification charts for documentation, process development statistical studies, and much more. However, in reality, the analytical gage is often heavily required for process control and setup purposes, so the inspection time holds up production.

Evaluation of measured results continues to evolve. It is driven partly by gear producers and gear designers and partly by efforts from suppliers to differentiate their products.
New methods to make analytical gear charts easier to interpret and intuitive are coming soon. The data collected enables the user to superimpose the deviations on a tooth in a 3D rendering with colors to amplify those deviations. The composite tooth deviation considering true index position enables simulation of the operating function. Measuring speed can be increased incrementally in some cases with insignificant effect on use for process control. Next generation analytical gages are emerging with drive, bearing, and control technology advances that not only improve speed and accuracy but are less costly to build. Education and support are what make the ultimate difference in conveying the proper analysis setup. The supplier that produces the gage should be one well versed of all gaging methods and ideally gear hard-finishing processes to recommend the most efficient control plan.
Analytical gear-inspection systems are equally sensitive to temperature changes, so traditionally they have required a tightly controlled atmosphere. Now, especially for large gears (for example more than 1,500 mm), efficiency of measurement is greatly enhanced by simplifying the handling to-and-from the gear checker. Temperature compensation of each axis combined with granite guideways and air bearings provide the necessary conditions where the inspection machine does not need to be in a climate-controlled room. Equipment designs and methods systematically evolve, providing more accurate measurements enabling higher gear component geometric quality. Demand for higher gear quality parallels advances in measurement capability.
Rules for inspection strategy and control plans for mass production with continuous flow processes differ more than one might expect. For small lot batch production and for highly specialized gears and shafts, there are no “cook book” standard strategies. It helps to go back to basics to understand and get a feel for the physical relationship between gear quality as it relates to production machine condition, as well as inspection machine or functional gage condition. Most people with even limited gear manufacturing experience will recall an instance where the inspection result was itself faulty or in error. The lesson should be that the grinding machine is exceptionally accurate, so indications of errors determined by inspection should be quantified and confirmed. For this reason and others mentioned earlier, the proposition that “closing the loop” between final inspection equipment and a machine tool improves efficiency may be false, at least for parallel gears.
Measurement data for process control in a broader sense also applies to variable data collected real time from grinding machines using integrated sensors on the machine such as axis-position sensing from the CNC. Temperature and flow sensors now stream digital data real time, so customers have access to the full stream of variable data in the plant as well as globally at company headquarters or other centers of knowledge. Algorithms must be developed to correlate part quality with conditions during the production of the gear or other precision component. This enters an unknown area, and the fruit of this effort may be difficult to harvest. In general, more data does not equate to better control of quality. Going back to basics, the condition of the tool and tool spindle directly influences the profile quality in grinding. The condition of the clamp tooling and work spindle influences the helix and gear run out. Experience also shows temperature variation of the machine and tooling directly influences the process stability. This is straightforward and should guide any investigative activity in search of root causes of gear deviations. Compensation for temperature variation already is available on gear-grinding machines; however, when temperature changes are non-linear and of different gradients, simple adjustments are not successful and actually may destabilize a process. Sensors for runout and load on spindles and tooling also are integrated into modern machines. Still, it is vitally important that machine designs are robust in their sensitivity to temperature and load.


