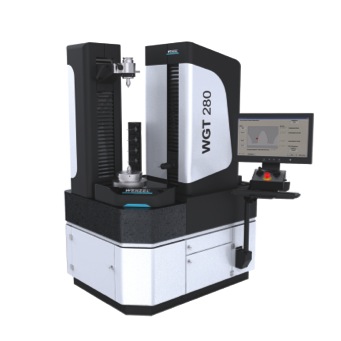
The gear manufacturer Gibbs Gears, located in UK-based Stoke Mandeville, met the challenge and extended their machinery with a gear measuring machine from Wenzel. Gibbs Gears has an international clientele, which consists of branches like aerospace, motorsport, medicine, and other commercial industrial sectors. It is always the company’s highest priority to fulfill their costumers’ individual requirements and demands. To be able to react flexibly and promptly, a measuring system as fast as it is flexible applicable is needed — the WGT 280.
 The business relations between Gibbs Gears and Wenzel reach back to 2005. Then Gibbs Gears bought a 3D coordinate measuring machine of the type LH 54 from Wenzel’s subsidiary in Gloucester. Although this measuring machine was convincing, with its reliability and ease of use, the process of making a decision to purchase a dedicated gear measuring machine was taken very serious. Dave Worthington, technical director at Gibbs Gears, explains. “Our purchase decision is based upon an extensive selection process. This represents a significant investment for us and we wanted to fully explore our options.”
Optimized Interaction of Manufacturing and Quality Assurance
Worthington went on to say, “With a customer base requiring more precision gears, precision gear grinding has become an important process in our production facility. Having doubled the capacity in this area over the last three years, we needed to increase our inspection capacity and capability to meet these demands. Our operations are split over two modern manufacturing units, with the main inspection cell being located in the main unit along with the offices. However, gear cutting and gear grinding — the main users of the CMM gear checker — are based in the adjoining unit.”
To optimize the internal process, the decision was made to relocate the LH 54 and to set it up directly next to the NC controlled roll checker. Furthermore, an air-conditioned enclosure to house the gear checking equipment was installed by Wenzel. Worthington said, “Gear checking can now be undertaken in its rightful place — the gear cell.”
The new gear measuring machine WGT 280 offers Gibbs Gears the possibility to fulfill their costumers increasing requirements. The WGT 280 can be used for the measurement of a broad span of gears and other rotationally symmetrical parts. Measurements of straight and helical bevel gears, cylindrical worms and worm gears, shafts, splines, and gear cutting tools can be carried out. Additionally, gears with unknown parameters can be measured using the reverse engineering functionality.
 The WGT 280 was designed to measure gears up to a diameter of 280 mm. Compactly constructed and occupying a small footprint, it can be easily integrated into existing processes. The easy to access measuring volume allows a simple loading and operation of the measuring system. The rotary table can be loaded with parts up to 50 kg in weight.
The machine is equipped with a Renishaw SP600 scanning probe allowing the measurement of gears starting with a module of 0.5 as standard. For the accurate measurement of shafts, the WGT 280 can be equipped with a tailstock. Z-axis measurement capacity is 500 mm.
Durability, High Precision, and Measuring Performance
During the development of the WGT 280, Wenzel focused on one of its core competencies, the highly precise finishing of the best metrological proven material — granite. The base plate and linear guides are manufactured from Impala dark granite and finished by hand. The combination of granite and air bearing technology realize the durability and high precision of the measuring systems. Wenzel’s gear measuring machines conform to the requirements of VDI/VDE 2612/13 Group 1.
The controller for Wenzel gear measuring machines was especially designed to meet the requirements of gear metrology. It provides optimal 4-axis control and high measuring performance. WGT gear measuring machines are equipped with a modular software package. The user is led intuitively through different input masks to enter parameters for part, measurement and analysis. Additionally, the user is supported by different graphics.
About Gibbs Gears Precision Engineers Ltd
Gibbs Gears are high quality gear manufacturers, serving both the UK and worldwide markets with top quality precision gears for the aerospace, motor sport, medical, marine, subsea and commercial industry sectors, for over 60 years. Gibbs Gears manufacture custom gears on a supply complete or gear cut only basis to customer’s drawings or sample specifications. Gibbs Gears have comprehensive gear manufacturing capabilities; this includes the manufacture of the following types of precision gears: Spur and helical, spline shafts, gear racks, pinions, worms and wheels, spiral and straight bevels gears, gearbox and gearbox assemblies, miniature gears, and bespoke gears to specification.


