In the previous article, we discussed hardness testing, and the various methods of hardness testing were illustrated. In this article we discuss the tensile testing. In tensile testing, a specially prepared specimen is readied and tested to destruction. In hardness testing, only a small indentation is made that generally does not affect the function of the part.
Tensile Testing
Tensile testing (ASTM E8/E8M [1]) is probably the most useful of all mechanical tests. The strength of a material and a measure of ductility are obtained. This data can then be directly used in the design of a part. In this test, a specially designed specimen is axial loaded continuously until failure occurs. The load and elongation are plotted during testing, and then converted to engineering stress and strain:
 where σ is the stress; e is the engineering strain; P is the load applied; A0 is the original cross-sectional area; δ is the measured elongation; and L0 is the original length. The obtained data is plotted as engineering stress and strain (Figure 1). A detailed mathematical treatment of the tensile test is provided by Nadai [2].

At the beginning of the test, there is a linear region where Hooke’s law is followed. The slope of this linear region is the elastic modulus E (for steels, the elastic modulus is about 30 x 106 psi). The yield stress, σys, which is the limit of elastic behavior, is defined as the point at which a small amount of permanent deformation occurs. This deformation is defined in the United States as a strain of 0.002 in./in. or 0.2% strain [1]. Loading past this point causes plastic deformation. As the plastic deformation increases, strain hardening occurs, making the material stronger. Eventually, the load reaches a maximum value and failure occurs. The ultimate tensile strength (σUTS) is determined by taking the maximum load experienced and dividing it by the original area:
 In ductile materials, the strain may increase after the maximum load is reached and the applied load is decreased. This point is the onset of necking (Figure 2). Necking progresses until the point of failure, giving rise to a “cup and cone” fracture (Figure 3). The ultimate strength is the most quoted property but is the least useful of all the properties determined from the tensile test. In ductile materials, ultimate strength is a measure of the maximum load that the material can experience in uniaxial loading. However, in brittle materials, the UTS is valid design information. The UTS used to be the basis for many designs and design codes (with a margin of safety), but now design codes rely on the yield strength instead. Because of its reproducibility, the UTS is often used for procurement, specifications, and quality documents. The yield strength, σys, is the stress required to obtain a small (0.2%) permanent strain. In other words, if the specimen were unloaded at the yield stress, it would be 0.2% longer than the original length. The yield strength is now the basis for many design codes and is used extensively in the determination of many other properties such as fracture toughness and fatigue strength.


The ductility of a tensile specimen is measured by the percent of elongation of the tensile specimen, and by the reduction of area after fracture:
 where Lf is the final gauge length after fracture, L0 is the original gauge length, A0 is the original cross-sectional area, and Af is the final cross-sectional area after fracture. Whenever reporting elongation, the gauge length is always reported, since the amount of elongation will vary with the gauge length.
The shapes of tensile specimens are standardized by ASTM. A wide variety of specimen shapes are permissible. Some examples are shown in Figure 4. Care in fabricating the tensile specimen is necessary to preclude faulty or inaccurate results. Heating and cold working of the specimens must be minimized during fabrication, or inaccurate yield and ultimate stress values may result. The specimens must be straight and flat; otherwise, a distortion of the elastic region and an inaccurate yield strength may result. During machining, the tensile specimens must be symmetrical about the load axis. If not, bending may occur, leading to erroneous results because of the combined stresses of tension and bending.

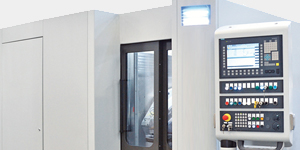
Testing machines used for tensile are generally simple. Either screw-type or hydraulic machines are used (Figure 5). The load is measured by a load cell, composed of strain gauges or a linear velocity displacement transducer (LVDT). This is recorded by a chart recorder as a plot of load versus strain.

The strain is measured by extensometers (Figure 6), which measure in situ the strain experienced by the tensile specimen. Modern extensometers use strain gauges to provide strain measurements. This is an advantage because it sends an electric signal proportional to the experienced strain to the chart recorder.

The tensile specimen is held during testing by either hydraulic or mechanical grips. Both methods grip the specimen by wedges with serrated surfaces. In mechanical grips, the load applied to the specimen forces the wedges tighter against the specimen by inclined surfaces inside the grip. With hydraulic wedges, hydraulic pressure is used to force the wedges against the specimen and hold it in place. For high-strength steels or steels that have hard or highly polished surfaces, hydraulic grips are preferred to prevent the specimen from slipping in the grip.
Conclusions
In this short article, the methodology of tensile testing was described. A brief discussion of the test, and test data, was conducted. Finally, a short description of the types of tensile specimens available, and the tensile testing equipment was discussed. It is hoped that this article will help you understand the basic tensile test used for the design of components, and to validate proper processing.
Should you have any comments, or suggestions for additional comments, please contact myself, or the editor.
References
- “ASTM E8/E8M-16A Standard Test Methods for Tension Testing of Metallic Materials,” ASTM International, West Conshohocken, PA, 2016.
- A. Nadai, Theory of Flow and Fracture of Solids, vol. Volume I, New York: McGraw-Hill, 1950.
- D. S. MacKenzie, “Mechanical Property Testing Methods,” in Steel Heat Treatment Handbook, 2nd Ed, G. E. Totten, Ed., Boca Raton, FL, Taylor Francis Group, 2006, pp. 1247-1302.
- Q. Han, K. Jiang, J. Wen and Y. Lu, “Micromechanical fracture models of Q345 steel and its weld,” J. Materials in Civil Eng., vol. 31, no. 11, pp. 1-15, August 2019.


