In the gear manufacturing industry, the final inspection process is the last step before the gear is shipped to the end user. In order to achieve reliable inspection data, a highly accurate device is needed for holding the pinion or gear. For the process of inspecting pinion teeth, the pinion is typically mounted between centers on the metrology machine. No fixturing is required. For inspecting gear teeth, especially gears used for automotive-sized applications, a mandrel is normally used. Once the gear is mounted to the mandrel, the mandrel is then mounted between centers on the metrology machine.
There are a variety of different mandrels on the market used for gear tooth inspection. The most basic is the solid centering mandrel, which is designed and manufactured to a defined bore size, and the accuracy is limited to the tolerance of the gear bore.
Expanding inspection mandrels are the most common and preferred method of inspecting gear teeth. The expanding mandrel can be mechanical, utilizing a collet in most cases, or hydraulic, utilizing hydraulic fluid to expand a thin walled sleeve. The expanding collet mandrel can accommodate different gear bores within a limited size range by changing over the collet. The collet is usually activated (expanded) by tightening a nut or bolt. The expansion range for the typical collet is 0.381 millimeter (0.015 inch) to 0.508 millimeter (0.020 inch). The accuracy is 0.0050 millimeter (0.0002 inch) TIR (total indicator reading). Hydraulic-style inspection mandrels are typically more accurate than colleting mandrels with 0.0025 millimeter (0.0001 inch) TIR. The expansion range is about half that of a colleting mandrel.
 Determining the right style of inspection mandrel depends on the part being inspected. For manufacturers that are producing a variety of gears with different bore sizes, the expanding mandrel is typically preferred. By changing out a collet, one mandrel can be used for a range of gear bores. The more basic solid centering mandrel is, in most cases, used by gear manufacturers with limited gear bore sizes, and oftentimes, these mandrels are manufactured by the gear producer.
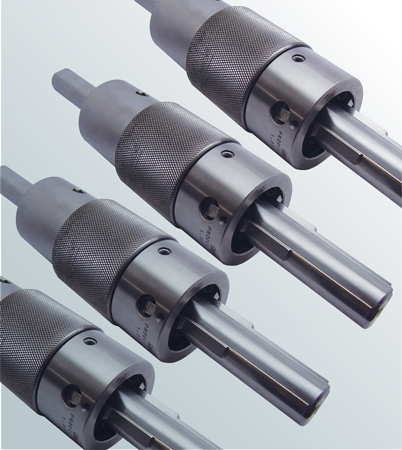
One of the common types of expanding mandrels for gear inspection is the LeCount® mandrel, which was patented in 1866 by William LeCount. Aside from advancements in manufacturing technology, there have been few changes to this product over its 150-year history, yet it’s still considered one of the premier gear tooth inspection mandrels in the industry due to its large range of expansion combined with its extreme accuracy and repeatability.
In comparison to the colleting or hydraulic inspection mandrels, the LeCount expanding mandrels have an expansion range of 3.175 millimeters (0.125 inch) to 25.4 millimeters (1.000 inch) for its standard bore sizes ranging from 6.350 millimeters (0.250 inch) to 177.800 millimeters (7.000 inches).
And, this large range of gear bore sizes is accomplished with just 12 total mandrels. Gleason Corporation, which purchased LeCount in 2007, guarantees the concentricity to be 0.0025 millimeter (0.0001 inch) TIR or better over the entire range of sizes.
How it works
The design and construction of the LeCount mandrel incorporate the principle of three parallel expanding jaws that slide uniformly on inclined, or tapered, ways. This gives the mandrel its sizable range of expansion.
 Where other expanding mandrels in the industry require a tool to activate, usually a wrench or Allen wrench, the LeCount mandrels are activated with a light tap. A tap to the tailstock end of the mandrel releases the jaws. No tools required.
Other types of lecount mandrels
Spline Mandrel
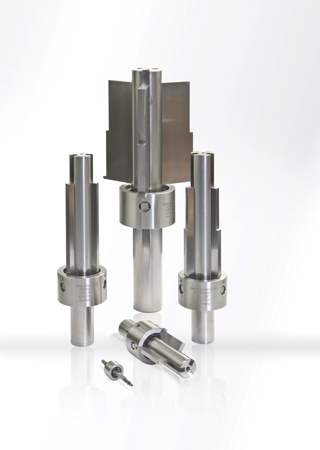
Many gears have splined bores. Most standard expanding mandrels can’t contact and center in either the pitch diameter or major diameter of a spline bore. The LeCount spline mandrel works on the same principles as the standard mandrels, except that the pitch diameter of the gear is ground into the contact edges of the three expanding jaws. They can also be made to contact the major diameter of the spline bore.
Grind Mandrel
 Over the years, Gleason found that many mandrels requiring repair had become worn or damaged because they were being used to hold gears during a grinding operation. For this reason, Gleason designed and developed the LeCount G (grind) mandrel, which is more robust to withstand the forces generated during grinding. By turning the mandrel to activate, unlike the tap-to-activate method used on the inspection mandrels, a consistent holding force is ensured.
The G mandrel is also sealed to keep chips, swarf, and other contaminates from entering the mandrel and inducing excessive runout. The accuracy of the production G mandrel is 0.005 millimeter (0.0002 inch) TIR.
Refurbishing
LeCount mandrels that become worn or damaged can be refurbished and certified by Gleason to like-new condition. A mandrel is checked for concentricity, disassembled, and cleaned, and the worn or damaged components are replaced. The mandrel is reassembled and checked again. For example, one customer had mandrels that were burned in an inspection room fire. The mandrels were black from soot, but they were disassembled and refurbished.
The key benefit of refurbishing mandrels is cost — the cost to refurbish a mandrel is roughly 50 percent of the price of a new mandrel.


