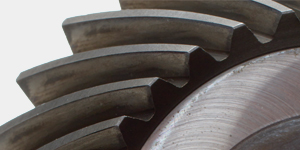
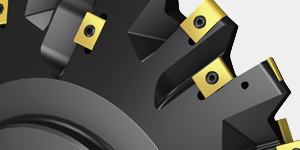
This paper shows how to produce worm screws when your actual gear hobbing machine configuration has the hob axis perpendicular to the workpiece axis with a swiveling of ±30 degrees for the hob head to produce helical gears. As known, from the perpendicular axis of the workpiece, the helix angle of a worm screw is of 90 degrees ±30 degrees. With this type of hobbing machine, it is not possible to produce a worm screw by the two conventional ways: with a worm milling cutter that’s cutting one thread after the other or using a worm screw hob to produce the multiple-thread screw in only one cut pass.
To solve the problem, consider how a hob meshes with a straight gear. Conceptually, it is like a worm screw meshing with a gear. Now, consider the opposite: The tool is the straight gear and looks like a shaping cutter. The workpiece is the worm screw. Using this concept, all the axes between the workpiece and the tool are reversed. The swivel axis of the tool has to rotate from 90 degrees minus the worm screw helix angle. That means it has to swivel ±30 degrees from the perpendicular between the tool axis and the workpiece. Theoretically, with this process, your machine can now produce any type of worm screws.
The rotation speeds are also reversed. In conventional gear hobbing, the workpiece rotation speed is given by the hob rotation divided by the gear tooth number and multiply by the gear’s thread number. Now, the cutting speed is given by the rotation of the workpiece. So, if a cutting speed of 8.66 ipm needs to be reached on a pitch diameter of 0.275 inch, the workpiece rotation will reach 9,100 rpm. The tool speed will be calculated by dividing the speed of the workpiece by its number of teeth and multiply by the screw’s number of threads. Everything is reversed. But, what is the advantage?
If an axial feed rate of 0.002 inch per piece revolution is given, the cycle time is going to be extraordinarily fast. A brass part about 0.472 inch long and turning at 9,100 rpm will be machined in 1.6 seconds, around eight times faster than a conventional worm cutter. Now, your initial problem has become a super-productive process. The only obstacle is to find a hobbing machine with high-speed synchronization for the workpiece spindles. This machine needs spindles that can reach 16,000 rpm to cover the entire range of small and micro-size worm screws. The tool tooth penetrates in the material like a turning tool cutter, but the difference is that the tool is turning and all its teeth are going progressively in the material to cut the worm screw profile. Each tooth takes a little amount of material, which makes the process quite soft and constant. The fast cycle time and the smooth surface finish quality make this process interesting for high-productivity precision worm screws.
Worm Screw Power Skiving
The term used for worm screw high-speed manufacturing is worm screw power skiving (WSPS). The basic idea has been known for years but has never been realized for a simple reason: No hobbing machines able to manufacture worms accurately by WSPS existed on the market. This is because direct-drive spindles with no backlash and high-resolution encoders are required to drive the cutter and the workpiece in a precise, synchronized motion. The aim of this paper is to present WSPS as a new process for new generation CNC machining centers.
As there is little reliable documentation about WSPS, this paper explains what Affolter has discovered and documented while testing a “new” way of worm hobbing. The company worked in collaboration with a Swiss hobbing tool manufacturer that provided ideas on how to implement the WSPS process into a conventional hobbing machine. The basic idea is good for small worms between DP127 (0.3 mm) and DP17 (1.5 mm). For this type of worm, manufacturing cycle time can be shortened by three to five times compared to standard worm hobbing. Therefore, WSPS is most applicable for small-pitch worms but less desirable for larger and wider worm pitch diameters.
Basic Principle
Worm screw power skiving is the exact opposite of standard gear hobbing. When a gear is hobbed, you can assimilate a screw (the hob) meshing with a straight gear (the workpiece). In the case of worm screw power skiving, it is a reverse process where the straight gear (the tool) meshes with the screw (the workpiece). See Figure 1, Figure 2, and Figure 3.


Hobbing is assimilated to milling. But WSPS has to be assimilated to turning. See Figure 4 and Figure 5.


WSPS is not limited to a restricted number of threads but mainly to the ZI involute worm profile. (See Figure 6 and Figure 7.) In some cases, a ZA profile can be realized with such a tool, but it has to be studied on a case-by-case basis.


Because the tool has to be tilted by the worm lead angle value, the cutting angle between the part and tool axis always changes according to the module and number of threads. This is why the worm lead angle g is limited by about 25 degrees. With a larger angle, there is a risk that the tool performances will decrease.
Because WSPS can be assimilated to turning, the surface finish can reach a high surface quality. Like a turning bit, the tool produces almost no burrs, but of course, some sharp angles will result on the entry and exit lead.
Differences Between Worm Hobbing and Worm Power Skiving
Cutting Speeds
One of the biggest differences between these two techniques is the fact that worm hobbing is a milling process, and WSPS is similar to a turning process. The cutting speed will be calculated based on the hob periphery for the hobbing process and on the worm pitch diameter for the WSPS process. (See Figure 8 and Figure 9.)

Figure 8: Worm hobbing cutting speed

Cutting Speed and Feed Rates
Table 1 provides various cutting speeds and feed rates commonly used for worm hobbing or WSPS.

The differences of the processes explain the variation of the cutting speeds and feed rates between worm hobbing and WSPS.
Axis Rotational Speeds and Synchronization Formulas
For standard hobbing, the rotational speed ratios between the hob and the workpiece can be calculated with the following formulas:
 Anyone familiar with gear hobbing will not be surprised that the hob is turning faster than the workpiece. To start the calculation, the hob’s rotational speed is determined by knowing the cutting speed that will be used for the process.
However, as previously explained, the whole process is inverted. The speeds will be inverse compared to conventional hobbing. The workpiece rotational speed can be calculated by knowing the cutting speed to reach on the pitch diameter. The next section will explain that due to a high number of teeth on the tool and a small worm pitch diameter, the part is turning at several thousands of rpm while the cutter only reaches a few hundreds of rpm.
 For helical gear hobbing, an angular compensation has to be brought into the workpiece rotational axis while feeding. In order to compensate for the helix of the gear, the workpiece rotational speed has to be accelerated while hobbing, whereas the cutter has to be decelerated for the WSPS process. This will compensate for the worm’s helix angle. (See Figure 10 and Figure 11.)


Calculation Example
Figure 12 shows an example of a worm that is perfectly dimensioned for WSPS. The worm has a module of 0.6 mm and an involute ZI profile.


For worm hobbing as well as for WSPS, the cycle time can be calculated from the feed rate given to the workpiece. The feed rate of the workpiece is determined in mm per workpiece revolution. Therefore, the cycle time is directly dependent on the workpiece revolution speed. The faster the workpiece turns, the shorter the cycle time will be. To compare the cycle time between worm hobbing and WSPS, consider a feed rate of 0.3 mm/workpiece revolution for hobbing and of 0.06 mm/workpiece revolution for WSPS. Since the length is the same, a cycle time factor can be determined. It’s important to note that the number of teeth on the tool does not affect the cycle time, unlike standard hobbing where the number of threads on the hob has an influence. The 0.8 factor is due to the different approach between worm hobbing and WSPS. Indeed, the cutter cannot cut in radially. The starting position of the workpiece feeding has to get an offset according to the cutter’s radius. This offset is smaller for standard worm hobbing. (See the WSPS cycle layout later in Figure 25.)
 Machining this part with the WSPS process is two-and-a-half times faster than worm hobbing. And that is without comparing WSPS to worm hobbing thread/thread, but to generation worm hobbing. This means that this procedure is extremely attractive for the production of small worms.
It is easy to determine up to which size WSPS is attractive and after which size standard worm hobbing is more beneficial. A reverse calculation can be done:
 Of course, this is only a representative basic calculation, but it shows that WSPS can be attractive for small worms with a pitch diameter under Ø20 mm.
Machine Kinematics
Conventional hobbing machines made for gear and worm production have to swivel the tool axis from +30 degrees to -120 degrees. With WSPS, a ±30 degree or ±45 degree swiveling hob head is required, meaning that the machine design will also be simpler. Why is this possible? Figure 13 shows the case of worm hobbing. The hob head axis has to swivel from the y helix angle value, which is the screw helix angle. However, for WSPS, the tool only has to swivel the value of the lead angle, g (see Figure 14).


Contrary to the hob, there is no helix on the WSPS cutter, explaining why the cutter’s head has to swivel from the worm lead angle only.
WSPS Process
Machine Configuration
For a better understanding of the process, Figure 15 shows the WSPS machine axis configuration.

In this machine axis configuration, the cutter is axially motionless while machining a worm. C-C’ spindle and tailstock are traveling on Z-Z’ with the workpiece — Z-Z’ being the feeding axis. Of great importance is the necessity to have the main spindle and the tailstock both powered by direct drive. Any backlash can create machining vibrations that will ruin the surface. The rotational stiffness is also a significant factor.
The three spindles have to be perfectly synchronized and monitored by high-resolution encoders to ensure the highest precision.
If this process is used for micro-worms with a pitch diameter under 4 mm, the speed of the workpiece spindles has to reach a high ideal rpm of up to 20,000 rpm for C-C’ (see calculation below). If necessary, the workpiece has to be secured with drive dogs on the driving centers. Otherwise, as soon as the part slips, vibrations occur, and the precision and quality is lost.
 Machining a Right- or Left-Hand Worm
Machining a right- or left-hand worm is done by swiveling the cutter’s head axis in A- or A+ in conventional hobbing. It is exactly the same for WSPS. But just as this process has everything inverted from the hobbing process, the swiveling direction to get a right- or left-hand worm is also inverted. For a helical gear with a left-hand helix, the A axis should be tilted in A+. For WSPS, tilting the A axis in A+ will give a worm with a right-hand helix. (See Figure 16 and Figure 17.)
- Right-hand worm: A axis swiveled in A+
- Left-hand worm: A axis swiveled in A-


Axis Movement Directions While Machining
Since WSPS is basically a turning process with many cutters rotating in perfect synchronization with the part’s threads, this process can be called next generation turning. Like any process, there are specific rotation directions that should always be followed; otherwise, the process will not work. But contrary to hobbing, there is no conventional or climbing process. There are only two ways to use this tool: One is for machining right-hand worms, and the other one is for left-hand worms. First and foremost, equivalent to the turning process, the workpiece has to always turn in the direction of the cutter’s cutting angle (see Figure 18). Figure 19 depicts the axis directions for a right-hand worm machining process, and Figure 20, a left-hand worm machining process.


As shown in the figures, the only parameters changing between a right- and left-hand machining are the cutter’s head swiveling axis moving from A+ to A- and its rotational direction.
Cutter Position
As shown in Figure 21, the center position of the cutter has to be aligned with the workpiece axis. The teeth of the cutter cut into the workpiece under its axis. The deeper the cutter goes into the workpiece, the closer it will get to the worm root diameter. When the cutter reaches the root diameter, it should never get over the workpiece axis. As in the conventional turning process, when the tool cut is above the part axis, the non-cutting part of the cutter will rub, and the tool will not cut. (See Figure 22, Figure 23, and Figure 24.)


WSPS Cycle Layout
See the WSPS cycle layout in Figure 25.

Future Work
Here are some different points and questions that still have to be addressed for future work:
- Determine the limits of cutting speed and feed rates according to the specific materials.
- What is the cutter lifetime?
- How does the flow and type of oil coolant influence the cutting quality?
- Determine the machine limits according to the type of worm that has to be machined.
Conclusion
WSPS requires a new generation CNC machine that offers three highly synchronized spindles, high stiffness, and good chip evacuation.
WSPS can be the ideal future process of small worm machining for small and big production batches. As a result of the reduced cycle time, customers can split the number of conventional worm hobbing machines by two or three for the appropriate type of worms. The quality and surface finish of the WSPS process can exceed what standard worm hobbing is currently offering. Since this process is similar to turning, WSPS fulfills these requirements. With this in mind, worm projects of the most demanding customers can be satisfied.
References
- The American Society of Mechanical Engineers, Advanced Computer Aided Design Simulation of Gear Hobbing by Means of Three-Dimensional Kinematics Modeling.
- Image from Sandvik Coromant.


