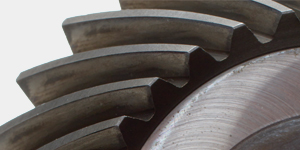
> Second in a series
Welcome back to the second article in our series. In the previous article, we discussed the fact that chemically accelerated/assisted superfinishing, also known as isotropic superfinishing, was introduced into the gear industry more than twenty years ago. Since that time, it has become widely accepted as a solution for numerous gear failure modes and performance enhancements. However, as a technology becomes more ingrained in an industry, the new wears off and it becomes more like a commodity product. As this happens, engineering drawings become more generic, as they start to incorporate low surface roughness callouts but little other guidance. Buyers start shopping for the lowest cost and fastest delivery not understanding that, perhaps, the technology is still evolving and improving, or that not all processes and suppliers will produce the same results.
Along the lines discussed above, the Gear Research Institute (GRI) located at Penn State University reached out for assistance reviewing test gears that had been isotropically superfinished to remove surface damage resulting from the shot peening of the tooth flanks. These gears were destined for use to evaluate several coatings through fatigue testing.
Upon receipt at GRI, the gears appeared to meet the surface finish requirements, but they retained the black conversion coating inherent with the stock removal portion of the process.
The team at GRI was concerned with the appearance, as they typically receive test gears sent for isotropic superfinishing that are mirror-like. Their main concern was that the coatings may not adhere properly, thus ruining their testing — and the expensive gears. These gears had not been processed by REM, but REM has been a member of the GRI Aerospace Bloc for many years and is recognized as an expert in the field of gear surface enhancement and isotropic superfinishing, so GRI reached out to us to evaluate these gears.
Upon receipt of the gears, REM was able to confirm that the gears had been improperly or incompletely burnished and that the conversion coating had not been removed from the tooth flanks. After a discussion with GRI and their customer, REM agreed to burnish the parts to the mirror-like appearance GRI was accustomed to receiving.
The first step of the investigation was to perform visual inspections, verify the surface roughness, and photograph the tooth flanks in the as-received condition with the heavy conversion coating intact. The tooth flanks appeared smooth, uniform, and black to the eye, just as GRI had described. See Figure 1 for a macro image of this condition.

The surface roughness measurements were taken using a contact profilometer following the REM standard procedure of measuring in the profile direction, centered on the flank and centered over the pitch line. The results indicated a very nice finish had been achieved at this location of Ra ~ 2 µin. (0.05µm). Again, very similar results to those observed by GRI.
Keyence Digital Microscope images were taken of the tooth flank to document the as-received condition. These, like the initial visual inspection, indicated the surface was nicely finished, but covered with the conversion coating. In the 30X magnification image shown in Figure 2, it is possible to see the light swirl/scratch patterns in the conversion coating created by the media during the refinement/stock removal process.

At this point, the team agreed to have REM perform only the second step of the isotropic superfinishing process, burnishing. The first article in this series offers a more in-depth explanation of the complete process, but a brief explanation of the burnish step follows.
The burnish step consists of a rinsing process with a mildly alkaline soap solution being introduced to the vibratory equipment while in operation. The combination of the burnish liquid flowing into the equipment and the mechanical rubbing action of the media cleans the conversion coating from the exposed surfaces of the gear. No stock/metal is removed from the part during this step, but it does result in the clean, reflective surface appearance most associated with an isotropically superfinished part.
To our surprise, the surface that looked so nice when covered with the black conversion coating revealed a very different condition once cleaned. The tooth surface that appeared so smooth and uniform was anything but smooth and uniform. It became very clear that the conversion coating was masking the true surface that still exhibited a substantial amount of the shot-peen texture. The Keyence image in Figure 3 taken again at 30x clearly shows not only that the peening dimples remain, but that the finishing process did not remove stock uniformly across the tooth flank. It appears that an inappropriately sized media may have been used for processing that accessed the center of the tooth face more readily than the addendum, dedendum, and root. This is a common issue when isotropically superfinishing gears with tight pitch teeth if the process is improperly designed. Special media mixtures must be tailored to generate a uniform finish on these types of gears. The image also indicates that the surface roughness may not be as low in the areas outside the tooth flank center.

Contact profilometry was again performed on the tooth flanks after cleaning with burnish. Repeating the measurement at the center of the tooth flanks resulted in similar roughness values as reported in the as-received condition with the conversion coating. There was little to no change in this area. However, when measuring in the lead direction at the addendum and dedendum across the residual shot peen dimples, the roughness value results were higher, as would be expected based on the image in Figure 3. These areas measured Ra ~ 4 µin. (0.1 µm). This is still considered a nice surface finish, but it is not what GRI had expected to receive for their test program to evaluate coating performance. After cleaning the parts, the concerns of coating adhesion had been addressed, but a new concern with the non-uniformity of the finish and the potential of the residual shot peen dimples to affect the performance had risen to the forefront. In the next, and final, installation of this article, we will review the rework process to remove the dimples and the resulting finish.


