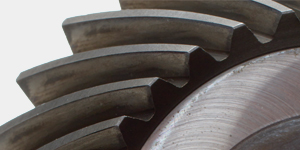
Regardless of the product, it is likely that it is heat-treated and quenched. Engine components are heat-treated for wear and durability (Figure 1). Aircraft components are heat-treated for strength and fracture toughness. Even bicycle frames are heat-treated for strength, lightness, and durability. To meet these needs, it is necessary to expand the knowledge of heat-treating and quenching to consistently produce a quality product, capable of being manufactured in a cost-effective manner.

In metallurgy, the definition of quenching is “the controlled extraction of heat.” The most important word in this definition is “controlled.” The quenchant is any medium that extracts heat from the part. The quenchant can be a liquid, solid, or gas.
Each quenchant, whether it is oil, water, aqueous solutions of polymer and water, or water-salt solutions, exhibits similar quenching characteristics. These basic characteristics need to be properly understood to fully master quenching.
Phases of Quenching
When a hot component comes in contact with the liquid quenchant, there are normally three stages of quenching. There are exceptions to this, which will be explained as we cover each stage. The three stages of quenching are:
- Vapor stage (stage A or vapor blanket stage).
- Boiling stage (stage B or nucleate boiling stage).
- Convection stage (stage C).
Vapor Stage
The vapor stage is encountered when the hot surface of the heated component first comes in contact with the liquid quenchant. The component becomes surrounded with a blanket of vapor.
In this stage, heat transfer is very slow, and occurs primarily by radiation through the vapor blanket. Some conduction also occurs through the vapor phase. This blanket is very stable and its removal can only be enhanced by agitation or speed improving additives. This stage is responsible for many of the surface soft spots encountered in quenching. High-pressure sprays and strong agitation eliminate this stage. If they are allowed to persist, undesirable micro-constituents can form.
Boiling Stage
The second stage encountered in quenching is the boiling stage. This is where the vapor stage starts to collapse and all liquid in contact with the component surface erupts into boiling bubbles. This is the fastest stage of quenching. The high-heat extraction rates are due to carrying away heat from the hot surface and transfering it further into the liquid quenchant, which allows cooled liquid to replace it at the surface. In many quenchants, additives have been added to enhance the maximum cooling rates obtained by a given fluid. The boiling stage stops when the temperature of the component’s surface reaches a temperature below the boiling point of the liquid. For many distortion prone components, high boiling temperature oils or liquid salts are used if the media is fast enough to harden the steel, but both of these quenchants see relatively little use in induction hardening.
Convection Stage
The final stage of quenching is the convection stage. This occurs when the component has reached a point below that of the quenchant’s boiling temperature. Heat is removed by convection and is controlled by the quenchant’s specific heat and thermal conductivity, and the temperature differential between the component’s temperature and that of the quenchant. The convection stage is usually the slowest of the 3 stages. Typically, it is this stage where most distortion occurs.
Figure 2 shows the three stages of quenching.

The three phases of quenching occur sequentially at one location. However, different locations will initiate the different phases at different times, depending on agitation and geometry of the part.
In general, at the initiation of quenching, the part is surrounded by a stable vapor phase. As the part slowly cools, it reaches the Leidenfrost temperature. The Leidenfrost temperature is dependent on many things such as agitation, surface roughness, surface tension of the fluid, and the hydrostatic pressure (depth of the part). It is difficult to predict. This temperature can also be changed by the presence of sharp edges, geometry, and the additive package.
Once at the Leidenfrost temperature, nucleate boiling begins. This often initiates at sharp corners or abrupt changes in geometry. In simple cylinders quenched vertically, nucleate boiling initiates at the corners of the cylinder at the upper and lower surfaces. The nucleate wave front then travels down the part from the top, and up the surface from the bottom, eventually converging.
As the part surface is cooled to approximately the boiling temperature of the quenchant, the convection phase begins. This is illustrated in Figure 3 where high-speed photography was used to capture the three phases of quenching as they occurred on a smooth steel cylinder quenched from 850°C.

It can be observed that the three phases of quenching can occur simultaneously on the part, and the part can have widely different surface temperatures as a result. One source of distortion is thermal gradients, so it is necessary to reduce these thermal gradients, usually by adequate agitation.
Obtaining properties and low distortion is usually a balancing act. Often, optimal properties are obtained at the expense of high residual stresses or high distortion. Low distortion or residual stresses are usually obtained at a sacrifice in properties. Therefore, the optimum quench rate is one where properties are just met. This usually provides the minimum distortion.
Conclusions
In this brief article, we discussed the basics of the mechanism of quenching. In subsequent articles, we will discuss methods for measuring and quantifying the mechanism of quenching.
Should you have any questions on this article, please email the author.


