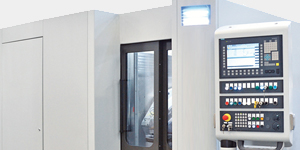
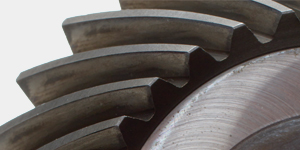
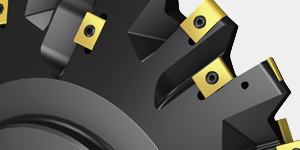
Henry Ford once said “If you need a new process and don’t install it, you pay for it without getting it.” Nowhere is this more applicable than in today’s manufacturing climate in which domestic manufacturers face tough competition from literally all over the globe. Because these competitors often have access to similar, or even the same equipment and machinery and have a seemingly endless supply of low-cost labor, domestic manufacturers must find ways of producing products as efficiently as possible and to eliminate most, if not all non value-added human touches. Robotic cells and systems are helping to achieve these efficiencies and are restoring a competitive edge to many companies, especially in the areas of gear production and deburring. (Figure 1)

Background
As long as gears are cut or hobbed from solid pieces of stock, the need to remove the burrs produced in the machining process will not go away. The most basic method of deburring gears is the timeless pneumatic grinder. High RPMs, a wide array of different grits and tool styles, and a relatively low cost of entry have made this type of manual deburring one of the most common methods in use today. As is the case with a manual mill, the end result is only as good as the machinist turning the handles. Manual deburring with a pneumatic grinder is no exception. The quality of edge finish on each tooth of every single gear is a direct function of the skill level of the operator performing the grinding, and it is therefore subject to human error. Even when using highly skilled labor that minimizes quality concerns, there is no way to avoid the direct labor expense associated with manual deburring. In the global arena in which many of us compete, domestic manual deburring processes should be reserved for special circumstances, as most production gears simply cannot bear a heavy domestic labor content.
Simple forms of automated deburring have been around for years. Many of these machines rotated the pinion or gear while a pneumatic die grinder with a small cutting wheel bumped along over each tooth, cutting away the edge. Other machines were similar, except that an abrasive brush replaced the cutting wheel and abraded the edge of each tooth around the perimeter of the gear. While perfectly adequate and effective for some gears, these methods were most definitely universal ones in which each gear model and style was pretty much ground or brushed the same way as other models, whether that process yielded the best results or not.
Evolution
Not too many years ago, CNC machines were considered luxuries that few small businesses could afford. Today, however, they are a given. If you are a player in the business, you probably own several of them. Just as multi-axis CNC machining centers have revolutionized machine shops and production floors and are now considered commonplace, six- and even seven-axis robots are revolutionizing the way gears are manufactured.
When starting down the road of robotic gear manufacturing, it is important to first determine if you need a dedicated module to address a specific need or whether a manufacturing system that encompasses all of your processes would best meet your needs and objectives. For example, a dedicated robotic deburring cell can be programmed and tooled to grind, cut, or brush burrs from the teeth of gears. It will perform this takt consistently and reliably and will continue to do so for as long as a steady supply of parts is presented to it. Although the actual deburring process has been automated, the manufacturer still requires direct, non value-added labor to load and unload the gear-cutting machine before deburring, and then more labor to load and unload the robotic cell for deburring. The process is definitely better than before, but there is still opportunity to make it even better.
A manufacturing system begins with the end in mind and seeks to streamline and address all aspects of the gear-making process. Instead of just automating the burr removal, the integrator engineers the cell so that the robot performs all essential tasks and produces the gear in the most efficient manner possible. Robotic tasks include:
• Automatically picking gear blanks from a pallet, bin, or conveyor;
• Automatically loading and unloading the gear-cutting machine;
• Automatically deburring gears;
• Automatically rinsing or dipping in rust inhibitor, if needed;
• Automatically loading the processed gear into a heat-treating fixture, another machine tool, or perhaps even final packaging.
In the system approach, the robot is fully utilized to enable the cell to operate autonomously instead of each process requiring direct labor. Although gear size and type will determine ultimate task time, one operator can often tend two or even three of these systems. Once the scope of the cell or system is defined, then we move to the specifics of the particular process(es) that we must perform and the equipment required to do so.
The Foundation
Every automation project should begin by asking these simple questions: where are the parts coming from; what processes do we need to perform; and where do the parts go next? While these questions seem simple enough, the answers will profoundly shape the final cell or system and will ultimately dictate its contents and subsequent cost.
If a cell is to run largely unattended, then the manner in which the cell receives the parts directly influences cell cost and complexity. Bulk metal containers full of forged, uncut pinions present a completely different set of challenges and requirements than flat gear blanks arranged neatly in plastic dunnage or cut-to-length round stock traveling down a flighted conveyor. The real driver here is whether or not we know where the parts are. If we do, then the robot is programmed and tooled to go to a specific point or series of locations on a pallet, pick the gear, and then present it to the various components of the cell. If the answer is no, then one of two steps must be taken: 1) introduce a mechanical feeding device that will orient the parts and ultimately allow us to answer with a “yes” that we know where the parts are; 2) provide the robot with added functionality and “smarts” to allow it to find parts on its own. This second option introduces a new component into the mix — machine vision.
Vision-guided robotic applications range from mild to wild. Basic 2D applications may be as simple as a fixed camera mounted above an indexing conveyor that sends X, Y, and Theta (angular orientation) part position coordinates to the robot controller. The robot then uses this new location data as a variable “pick point” for the next part. Two-D systems are also frequently used to pick stacked parts from pallets. These parts will often be packed in layers separated by cardboard or plywood slip-sheets. In this case the robot picks all of the parts from a layer, uses a different tool to remove the slip-sheet and set it aside, and then resumes picking parts from the next level. (Figure 2)

Depending on your specific needs, multiple pallets of incoming parts may be staged on a conveyor feeding the cell. When the robot has removed all parts from the pallet, the empty pallet is fed out of the station and a new pallet is fed in. This exchange often occurs during the gear cutting cycle, allowing automatic cell operation to resume with little or no interruption to gear cutting and production.
At the other end of the vision spectrum are 3D vision guided systems. Three-D systems merge single and/or multiple cameras with lasers and special software to allow the robot to more closely replicate human hand-eye coordination functions. Using the original example of bulk pinion blanks randomly packed into large metal containers, a robot equipped with a 3D vision system would be capable of “finding” a pickable blank and then retrieving it from the bin. Much as a person would bend over and pick a blank gear from a pile of parts, 3D vision guidance systems are enabling robots to perform many of these same tasks, eliminating the need for mechanical feeders and additional peripheral equipment. (Figure 3)

The benefit of vision-guided picking versus using hard automation to feed the parts can be summed up in one word—flexibility. Dedicated, hard automation is ideally suited to running a large quantity of a very few types, or even one type or style, of parts. A good example would be a high volume machining line making one or two parts with long runs between changeovers. Hard automation excels in this instance. By contrast, “flexible automation” is often the only choice when SKUs run high, volumes run low, and changeovers are a frequent occurrence. Using flexible automation cameras can be programmed to “see” multiple part types and models, and the robot can access multiple end-of-arm-tools to accommodate a wide variety of parts.
We have the parts, so now what? The actual cutting or hobbing process is one of the most capital-intensive and time-consuming functions in the entire gear manufacturing process. Because of the relatively long takt time of hobbing compared to the other cell functions, the controls system should insure that the cutting machine has priority and never has to wait to be loaded or unloaded. The run time of this machine will ultimately establish the amount of time available to perform other cell tasks.
To minimize the time required to remove the cut gear and then load the next blank, robots often use multiple sets of tooling mounted on a common base. Before the cutting machine stops, the robot picks the next blank in one set of its tooling. When the door opens, the robot reaches in, picks the cut gear in its empty gripper, rotates the tooling to present the fresh blank, reloads the machine workholding, and then quickly retracts outside of the door. When the robot is clear, it sends a signal to the gear cutter to resume production. Effecting a quick part exchange and resumption of cutting insures that we don’t violate the #1 rule of manufacturing; don’t starve a bottleneck.
Deburring
With cut gear in hand, the robot now moves to the deburring process. The first step is to determine the specifications and requirements for the gear. What is the gear material, and its hardness? Does the print call for a dimensional chamfer, or just to remove all burs? Does it call for a radiused blending of the tooth to the root? Is there a specified surface finish? Is a CAD model available? Do we use the robot to present the gear to a fixed cutting tool or do we fix the gear and present the tool to the part? The answers to these questions will determine or at least influence the methods used to finish the gear.
Cutting vs. Grinding: Material type and hardness will determine if we use a carbide cutter in a high speed spindle to shape a green tooth or if we must instead grind the desired dimensions using abrasive discs, belts, or wheels. Gear geometry can also dictate the deburring method, as some tools simply will not fit into the tight spaces in some gears. Cutting is a fast way to shape a green tooth. Proper feeds and speeds should yield chatter-free material removal. If space permits, grinding can remove parent material and shape teeth on both green and hard gears.
Abrasive Brushes: Brushes come in multiple sizes, styles, and compounds. Brushes made from stainless steel or ferrous wire have been used for years to remove fine burrs. The brushes are available in a wide variety of configurations ranging from fine wires to heavy, knotted configurations. Each yields different levels of abrasiveness and rates of removal. When used on ferrous gears, steel wire brushes are very effective at removing burrs but not removing parent material. When working with softer gears, care should be taken to avoid degradation of the part or ferrous contamination.
Engineered brushes today are commonly made from nylon or similar plastic materials and are often impregnated with a variety of abrasives to produce the desired end result. Carbide-blended nylon brushes are frequently used to debur steel and cast iron gears. The nylon serves as a carrier for the carbide grit and can produce extremely high cutting rates. These brushes will not only remove burrs but also will remove some parent material to produce a “melting” effect on the edges that they contact. This is highly desirable in some instances, but unacceptable in others.
Part Marking: Gears often require part numbers and/or bar codes to be applied after machining. This is a function that can easily be incorporated into a robotic cell. The two methods most commonly observed are impact pin writers and laser markers. Assuming adequate space on the gear, each is capable of applying a permanent part number and either 1D or 2D matrix bar code to the gear. Impact markers operate on the principle of a hardened, pointed carbide stylus that is pneumatically thrown into the part to produce a single indention-dot. As with a dot matrix printer, the stylus creates a series of dots that form characters. Air pressure can be adjusted to increase or decrease the depth of the dots on the part.
Laser markers are growing in popularity due to their flexibility and ease of ownership. Unlike impact writers, laser markers produce an etched mark on the surface of the substrate and can mark on a large variety of materials. Softer materials usually respond better to laser marking, while ferrous materials require higher power and more time to mark. Also of note, laser markings are not usually very deep. If the gear will be exposed to an abusive environment such as a salt spray, the impact writer may be a better choice than the laser.
The robotic cell controls system will stream data to the controller of whatever marker is employed. As part of an overall system, the cell controller already knows which part is in process and can easily send this information to the marker. Commonly marked data includes Julian date, batch, lot, part number, and serial number.
Rinsing: If the gear is going to be heat-treated in a furnace, it should probably be rinsed to remove cutting fluids and other contaminants. Most manufacturers realize better process control, reduced emissions, and increased furnace life when treating clean parts instead of dirty ones. While the robot has the gear in its tooling, it is relatively easy to dip it into a tank or stream of washing fluid. If needed, the part can be loaded into a true washing machine and fed through it on a conveyor. With a bit of planning, the robot can pick the clean part when it exits the washer and present it to the next process. (Figure 4)

Packing: The robot is now holding a cut, deburred, marked, and rinsed part in its tooling. Where does it go from here? Frequently, the answer is to heat treating, to another machine tool, or to final packaging. Armed with the answer to this question, the integrator can engineer the cell to further promote lean principles and present the gear to the next process in the best possible manner. For heat-treating, we frequently load parts into heat treat racks. Depending on the throughput requirements these racks might be automatically presented to the cell much as the pallets of incoming parts. If going to another machine tool for additional machine work, then perhaps we place the part into dunnage that promotes automation at that cell, or maybe the robot places the part on a handoff stand so that another robot can retrieve it for subsequent processing. If it is going directly to final packaging, does it need to be dipped in rust inhibitor or paraffin? Does it need to be bagged? Can we place it directly into a box? If so, where does the box go? To a pallet? If we have additional time in the cell (dictated by the gear cutting machine takt time), can we robotically palletize the gears? These questions are numerous but need to be asked—and answered—to insure that a lack of advanced planning does not now erode the efficiencies that we gained in the previous steps.
Robot Programming
History is full of the legendary alchemist’s dream of turning lead into gold. Not that long ago the robot programmer’s equivalent dream was converting CAD data to a robot path. Unlike the alchemist, huge strides and even a few leaps have been made to make CAD-to-path a reality today. Most of the major robot manufacturers offer their own version of offline programming software. These programs are extremely useful tools but still require the person at the computer to have at least a base knowledge of robotic programming. Lest this seem imposing, anyone capable of learning CNC programming can usually learn robots too.
CNC programmers have been using CAD/CAM programs for years to generate tool paths and associated multi-axis G-code programs for their CNC machines. This level of control and software is now crossing over into robotic programming. One of the biggest names in CAD/CAM programming now has an add-on package that effectively turns a six-axis robot into a six-axis machine tool. This package looks and feels like its parent CAD/CAM program and will be transparent to most anyone who routinely programs CNCs, enabling manufacturers to redeploy their existing resident expertise in an expanded and valuable capacity. The basic steps are:
• Open CAD file in parent program;
• Define surfaces to be processed/polished/deburred;
• Define process parameters (tool width, overlap, direction, orientation of part relative to tool, etc.);
• Define robot parameters (user frame, tool datum, home position, sixth axis orientation of TCP to part faces);
• Process simulation (check for errors);
• If acceptable, then post-process simulation;
• Export program to robot controller.
Staying Competitive
The United States has lost a significant portion of its manufacturing base in the last 20 years to other countries due to decreased production costs. As a robotic system integrator we can develop automated cells and manufacturing systems for gear producers to help level the playing field. Remember, every time a part is handled something is added, and it’s not always value.


