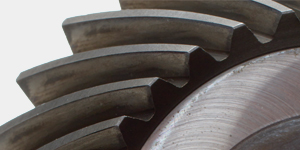
Misalignment of an overhung pinion is easy to understand, but sometimes we see signs of misalignment even though the gear and the pinion are both supported between bearings. When pitting failure extends only halfway across the tooth face, it’s a sure sign of misalignment under load. What caused the misalignment? The key lies in the words “under load.” Here are some of the possibilities:
1) Bending of the pinion shaft. If the center of the pinion is not in the center of the bearing span, any bending deflection of the pinion shaft will cause a slope, forcing the load toward the end of the pinion closest to a bearing.
2) Twisting of the pinion shaft. Heavily loaded, slender pinions “wind up” under load, forcing the load toward the end of the pinion closest to the input.
3) Poor adjustment of tapered roller bearings.
4) Bearing wear.
5) Case deflection due to poor foundation or heavy load.
6) Manufacturing error in the case or gears.
In any case, it must be fixed. If the misalignment is allowed to persist, the teeth will fail. The diagram shows a sample bearing arrangement. Two tapered roller bearings, one at each side of the box, were expected to carry the radial load and the thrust load induced by the helical gear teeth.
Unfortunately, a careless assembler didn’t get the cone of one bearing seated all the way against its shoulder. A simple check with a feeder gauge between the back of the cone and the shoulder would have shown a gap, but the check was overlooked. The press fit held the cone in place for a while, but an overload moved it to the shoulder, creating a gap between cup and cone. A loose adjustment would have had the same effect.

Once the bearings were loose, the thrust from the helical teeth pushed the pinion tightly into one cup, as shown in the diagram. The other bearing was then loose, so its cone shifted laterally away from the load, leaving the pinion misalignment. The pinion teeth at the end with the tight bearing took all of the loadãuntil they began to pit. Careful assembly will prevent this problem, if the gear case is stiff enough to support the bearings. Here are some easy tips to help you get it right:
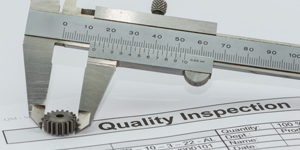
1) Be sure the cones are seated against the shoulders on the shaft; use a .001″ feeler gauge between the back of the cone and the shoulder to check. When possible, press the bearing into place instead of heating it. It can’t shrink back from the shoulder if it’s pressed against it.
2) Be sure cups are seated, too. A stray burr can keep the cup from seating and leave room for movement when the load is applied.
3) Be extra careful shimming gear box bearings. They really should run at no clearance, but that may be too tight to run cool. One to three thousandths is usually enough clearance.
4) Check bearing temperatures and gear tooth contact patterns after a few hours under load to be sure everything is as you left it.


